
Раніше ми розглядали параметри зберігання та налаштування за допомогою редактора блоків WordPress (Gutenberg) і розширення сценарію створення блоку, щоб дозволити додаткові кінцеві точки. У цьому посібнику ми об’єднаємо їх усіх, щоб створити сторінку налаштувань за допомогою компонентів Gutenberg.
Сторінка налаштувань, яку ми збираємося створити
Але по-перше, заслуга там, де це належне, натхненням для цього посібника є стаття Хардіпа Асрані про код у WP: створення «сторінки параметрів плагіна» за допомогою компонентів Gutenberg.
передумови
- Дотримуйтесь посібника «Створення плагіна для редактора блоків WordPress» (Gutenberg).
- Дотримуйтесь посібника «Використання параметрів для зберігання даних у редакторі блоків WordPress» (Gutenberg).
- Дотримуйтесь інструкцій із додавання точок входу до посібника зі створення сценарію блоку WordPress
Створіть сторінку налаштувань у PHP
Дотримуючись посібників у попередніх вимогах, відкрийте кореневий файл PHP плагіна (у цьому випадку wholesome-plugin.php) і додайте наступне:
Зареєструйте налаштування
Як і в посібнику з використання параметрів зберігання даних, додайте такі параметри до файлу:
function wholesomecode_wholesome_plugin_register_settings() {
    register_setting(
        'wholesomecode_wholesome_plugin_settings',
        'wholesomecode_wholesome_plugin_example_select',
        [
            'default'      => '',
            'show_in_rest' => true,
            'type'         => 'string',
        ]
    );

    register_setting(
        'wholesomecode_wholesome_plugin_settings',
        'wholesomecode_wholesome_plugin_example_text',
        [
            'default'      => '',
            'show_in_rest' => true,
            'type'         => 'string',
        ]
    );

    register_setting(
        'wholesomecode_wholesome_plugin_settings',
        'wholesomecode_wholesome_plugin_example_text_2',
        [
            'default'      => '',
            'show_in_rest' => true,
            'type'         => 'string',
        ]
    );

    register_setting(
        'wholesomecode_wholesome_plugin_settings',
        'wholesomecode_wholesome_plugin_example_text_3',
        [
            'default'      => '',
            'show_in_rest' => true,
            'type'         => 'string',
        ]
    );

    register_setting(
        'wholesomecode_wholesome_plugin_settings',
        'wholesomecode_wholesome_plugin_example_toggle',
        [
            'default'      => '',
            'show_in_rest' => true,
            'type'         => 'string',
        ]
    );
}
add_action( 'init', 'wholesomecode_wholesome_plugin_register_settings', 10 );
Зареєструйте налаштування, до яких ми матимемо доступ на сторінці налаштувань. Обов’язково встановіть show_in_restдля trueкожного з них, щоб до них можна було отримати доступ через Gutenberg.
Зареєструйте сторінку налаштувань
Додайте блок коду для реєстрації сторінки налаштувань:
function wholesomecode_wholesome_plugin_settings_page() {
    add_options_page(
        __( 'Wholesome Plugin Settings', 'wholesome-plugin' ),
        __( 'Wholesome Plugin Settings', 'wholesome-plugin' ),
        'manage_options',
        'wholesome_plugin_settings',
        function() {
            ?>
            <div id="wholesome-plugin-settings"></div>
            <?php
        },
    );
}
add_action( 'admin_menu', 'wholesomecode_wholesome_plugin_settings_page', 10 );
Наведений вище код додає нову сторінку до меню налаштувань. Зверніть увагу, що все, що він робить, це виводить a <div>, це те, що ми будемо використовувати для візуалізації компонентів Gutenberg на основі React.
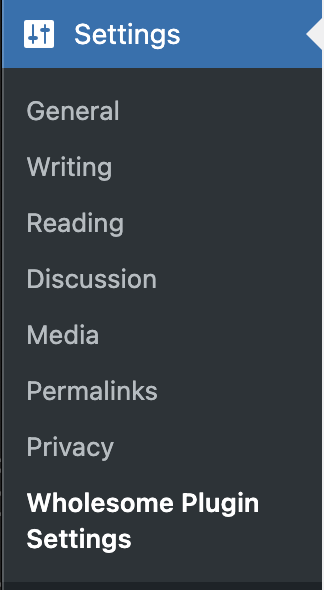 Пункт меню налаштувань
Поставте ресурси адміністратора в чергу
Щоб отримати наступний блок коду, нам потрібно виконати всі кроки в посібнику «Додати точки входу до створення сценарію блоку ». Переконайтеся, що ви виконали всі кроки в цьому посібнику перед цим кроком, а потім поверніться та виконайте решту цього посібника.
function wholesomecode_wholesome_plugin_admin_scripts() {
    $dir = __DIR__;

    $script_asset_path = "$dir/build/admin.asset.php";
    if (! file_exists( $script_asset_path)) {
        throw new Error(
            'You need to run `npm start` or `npm run build` for the "wholesomecode/wholesome-plugin" block first.'
        );
    }
    $admin_js     = 'build/admin.js';
    $script_asset = require( $script_asset_path );
    wp_enqueue_script(
        'wholesomecode-wholesome-plugin-admin-editor',
        plugins_url( $admin_js, __FILE__ ),
        $script_asset['dependencies'],
        $script_asset['version']
    );
    wp_set_script_translations( 'wholesomecode-wholesome-plugin-block-editor', 'wholesome-plugin' );

    $admin_css = 'build/admin.css';
    wp_enqueue_style(
        'wholesomecode-wholesome-plugin-admin',
        plugins_url( $admin_css, __FILE__ ),
        ['wp-components'],
        filemtime( "$dir/$admin_css") );
}
add_action( 'admin_enqueue_scripts', 'wholesomecode_wholesome_plugin_admin_scripts', 10 );
Створіть сторінку адміністратора в JavaScript
Якщо ви виконали всі кроки в посібнику «Додати точки входу до створення сценарію блоку », у вас має бути /src/admin.jsфайл. Відкрийте цей файл і видаліть його вміст.
Відобразіть компонент
Не забудьте запустити npm startу своєму терміналі відповідно до посібника зі створення плагіна та додати наведене нижче до свого /src/admin.jsфайлу.
import './admin.scss';
import { Icon } from '@wordpress/components';
import {
    Fragment,
    render,
    Component,
} from '@wordpress/element';
import { __ } from '@wordpress/i18n';

class App extends Component {
    constructor() {
        super( ...arguments );
    }

    render() {
        return (<Fragment>
                <div className="wholesome-plugin__header">
                    <div className="wholesome-plugin__container">
                        <div className="wholesome-plugin__title">
                            <h1>{ __( 'Wholesome Plugin Settings', 'wholesome-plugin') } <Icon icon="admin-plugins" /></h1>
                        </div>
                    </div>
                </div>
                <div className="wholesome-plugin__main"></div>
            </Fragment>) }
}

document.addEventListener( 'DOMContentLoaded',() => {
    const htmlOutput = document.getElementById( 'wholesome-plugin-settings' );

    if (htmlOutput) {
        render(
            <App />,
            htmlOutput
        );
    }
});
Якщо ви перейдете на сторінку налаштувань у браузері, ви побачите таке:
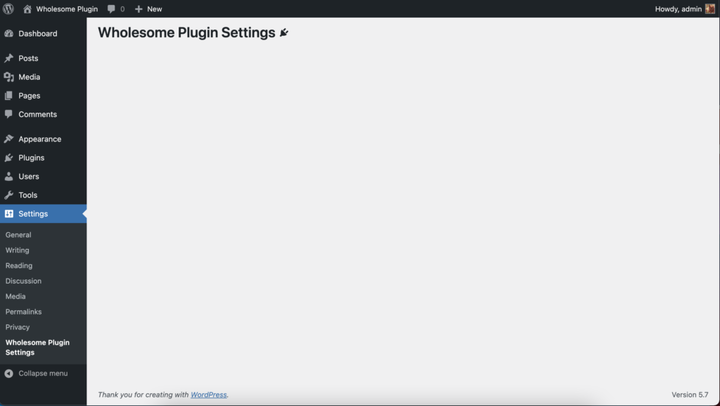 Відтворення компонентів на екрані налаштувань
Додайте поля налаштувань
Пам’ятаєте додаткові кроки в посібнику «Використання параметрів для зберігання даних»? Що ж, ми майже дослівно вставимо їх у цей компонент, тож у вас має вийти код, який виглядає приблизно так:
import './admin.scss';

import api from '@wordpress/api';

import {
    Button,
    Icon,
    Panel,
    PanelBody,
    PanelRow,
    Placeholder,
    SelectControl,
    Spinner,
    TextControl,
    ToggleControl,
} from '@wordpress/components';

import {
    Fragment,
    render,
    Component,
} from '@wordpress/element';

import { __ } from '@wordpress/i18n';

class App extends Component {
    constructor() {
        super( ...arguments );

        this.state = {
            exampleSelect: '',
            exampleText: '',
            exampleText2: '',
            exampleText3: '',
            exampleToggle: false,
            isAPILoaded: false,
        };
    }

    componentDidMount() {

        api.loadPromise.then(() => {
            this.settings = new api.models.Settings();

            const { isAPILoaded } = this.state;

            if (isAPILoaded === false) {
                this.settings.fetch().then( (response) => {
                    this.setState( {
                        exampleSelect: response[ 'wholesomecode_wholesome_plugin_example_select' ],
                        exampleText: response[ 'wholesomecode_wholesome_plugin_example_text' ],
                        exampleText2: response[ 'wholesomecode_wholesome_plugin_example_text_2' ],
                        exampleText3: response[ 'wholesomecode_wholesome_plugin_example_text_3' ],
                        exampleToggle: Boolean( response[ 'wholesomecode_wholesome_plugin_example_toggle' ] ),
                        isAPILoaded: true,
                    } );
                } );
            }
        } );
    }

    render() {
        const {
            exampleSelect,
            exampleText,
            exampleText2,
            exampleText3,
            exampleToggle,
            isAPILoaded,
        } = this.state;

        if (! isAPILoaded) {
            return (<Placeholder>
                    <Spinner />
                </Placeholder>
            );
        }

        return (<Fragment>
                <div className="wholesome-plugin__header">
                    <div className="wholesome-plugin__container">
                        <div className="wholesome-plugin__title">
                            <h1>{ __( 'Wholesome Plugin Settings', 'wholesome-plugin') } <Icon icon="admin-plugins" /></h1>
                        </div>
                    </div>
                </div>

                <div className="wholesome-plugin__main">
                    <Panel>
                        <PanelBody
                            title={ __( 'Panel Body One', 'wholesome-plugin') }
                            icon="admin-plugins"
                        >
                            <SelectControl
                                help={ __( 'An example dropdown field.', 'wholesome-plugin') }
                                label={ __( 'Example Select', 'wholesome-plugin') }
                                onChange={ (exampleSelect) => this.setState( { exampleSelect }) }
                                options={ [
                                    {
                                        label: __( 'Please Select...', 'wholesome-plugin' ),
                                        value: '',
                                    },
                                    {
                                        label: __( 'Option 1', 'wholesome-plugin' ),
                                        value: 'option-1',
                                    },
                                    {
                                        label: __( 'Option 2', 'wholesome-plugin' ),
                                        value: 'option-2',
                                    },
                                ] }
                                value={ exampleSelect }
                            />
                        </PanelBody>
                        <PanelBody
                            title={ __( 'Panel Body Two', 'wholesome-plugin') }
                            icon="admin-plugins"
                        >
                            <TextControl
                                help={ __( 'This is an example text field.', 'wholesome-plugin') }
                                label={ __( 'Example Text', 'wholesome-plugin') }
                                onChange={ (exampleText) => this.setState( { exampleText }) }
                                value={ exampleText }
                            />

                        </PanelBody>
                        <PanelBody
                            title={ __( 'Panel Body Three', 'wholesome-plugin') }
                            icon="admin-plugins"
                        >
                            <PanelRow>
                                <TextControl
                                    help={ __( 'Use PanelRow to place controls inline.', 'wholesome-plugin') }
                                    label={ __( 'Example Text 2', 'wholesome-plugin') }
                                    onChange={ (exampleText2) => this.setState( { exampleText2 }) }
                                    value={ exampleText2 }
                                />
                                <TextControl
                                    help={ __( 'This control is inline.', 'wholesome-plugin') }
                                    label={ __( 'Example Text 3', 'wholesome-plugin') }
                                    onChange={ (exampleText3) => this.setState( { exampleText3 }) }
                                    value={ exampleText3 }
                                />
                            </PanelRow>
                        </PanelBody>
                        <PanelBody
                            title={ __( 'Panel Body Four', 'wholesome-plugin') }
                            icon="admin-plugins"
                        >
                            <ToggleControl
                                checked={ exampleToggle }
                                help={ __( 'An example toggle.', 'wholesome-plugin') }
                                label={ __( 'Example Toggle', 'wholesome-plugin') }
                                onChange={ (exampleToggle) => this.setState( { exampleToggle }) }
                            />
                        </PanelBody>
                        <Button
                            isPrimary
                            isLarge
                            onClick={ () => {}}
                        >
                            { __( 'Save', 'wholesome-plugin') }
                        </Button>
                    </Panel>
                </div>
            </Fragment>) }
}

document.addEventListener( 'DOMContentLoaded', () => {
    const htmlOutput = document.getElementById( 'wholesome-plugin-settings' );

    if (htmlOutput) {
        render(
            <App />,
            htmlOutput
        );
    }
});
Крім видалення subscribein componentDidMount, який ми раніше використовували для збереження в цьому посібнику, і додавання кнопки, код практично копіюється та вставляється.
Якщо все добре, наша сторінка налаштувань тепер має виглядати приблизно так:
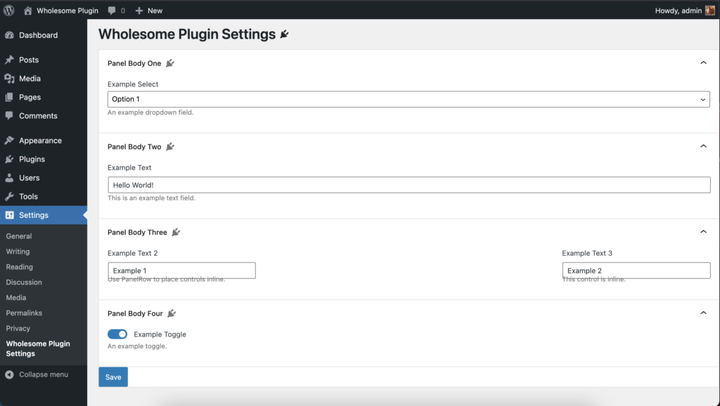 Візуалізація полів налаштувань
Не хвилюйтеся, ми очистимо стилі в розділі 4 цього посібника.
Обробка збереження
В onClickобробнику <button>компонента додайте такий код:
<Button
  isPrimary
  isLarge
  onClick={ () => {
    const {
      exampleSelect,
      exampleText,
      exampleText2,
      exampleText3,
      exampleToggle,
    } = this.state;

    const settings = new api.models.Settings( {
      [ 'wholesomecode_wholesome_plugin_example_select' ]: exampleSelect,
      [ 'wholesomecode_wholesome_plugin_example_text' ]: exampleText,
      [ 'wholesomecode_wholesome_plugin_example_text_2' ]: exampleText2,
      [ 'wholesomecode_wholesome_plugin_example_text_3' ]: exampleText3,
      [ 'wholesomecode_wholesome_plugin_example_toggle' ]: exampleToggle? 'true': '',
    } );
    settings.save();
  }}
  >
  { __( 'Save', 'wholesome-plugin') }
</Button>
Це збереже наші параметри та налаштування після натискання кнопки. Однак немає ознак того, що параметри збережено за замовчуванням.
Створіть сповіщення
Щоб надати нашому користувачеві деякий відгук про те, що параметри та налаштування збережено, давайте запровадимо сповіщення «панелі швидкого доступу». Це те саме сповіщення, яке використовується на головному екрані редактора публікацій, яке використовує редактор блоків, коли публікацію було збережено.
Щоб додати це, нам потрібно перенести основний компонент Gutenberg у нашу збірку, оскільки список сповіщень недоступний за допомогою звичайних операторів імпорту.
Нам потрібно буде додати наступний код у файл:
import { SnackbarList } from '@wordpress/components';

import {
    dispatch,
    useDispatch,
    useSelect,
} from '@wordpress/data';

import { store as noticesStore } from '@wordpress/notices';

const Notices = () => {
    const notices = useSelect( (select) =>
            select( noticesStore) .getNotices()
                .filter( (notice) => notice.type === 'snackbar' ),
        []
    );
    const { removeNotice } = useDispatch( noticesStore );
    return (<SnackbarList
            className="edit-site-notices"
            notices={ notices }
            onRemove={ removeNotice }
        />
    );
};
Потім у головному рендері <App>компонента додайте наступне перед закриттям </Fragment>:
<div className="wholesome-plugin__notices">
  <Notices/>
</div>
Нарешті додайте наступне до onClickобробника кнопки:
dispatch('core/notices').createNotice(
  'success',
  __( 'Settings Saved', 'wholesome-plugin' ),
  {
    type: 'snackbar',
    isDismissible: true,
  }
);
Це створюватиме невелике спливаюче вікно «панелі швидкого доступу» під час збереження налаштувань.
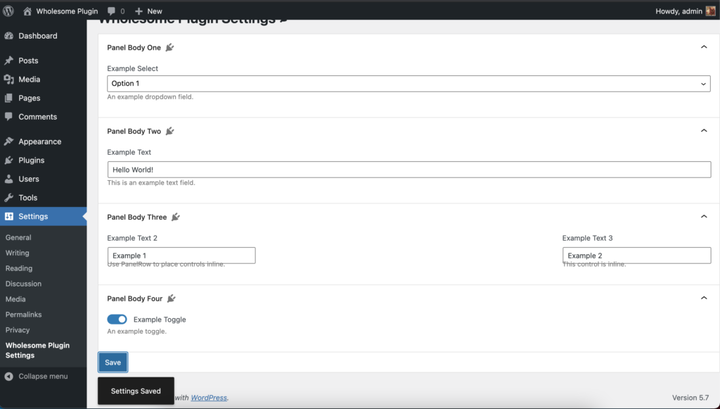 Сповіщення Snackbar в дії
Я знаю, я знаю, нам ще потрібно виправити ці стилі.
Повний /src/admin.jsфайл
Для довідки ось повний /src/admin.jsкод файлу:
import './admin.scss';

import api from '@wordpress/api';

import {
    Button,
    Icon,
    Panel,
    PanelBody,
    PanelRow,
    Placeholder,
    SelectControl,
    SnackbarList,
    Spinner,
    TextControl,
    ToggleControl,
} from '@wordpress/components';

import {
    dispatch,
    useDispatch,
    useSelect,
} from '@wordpress/data';

import {
    Fragment,
    render,
    Component,
} from '@wordpress/element';

import { __ } from '@wordpress/i18n';

import { store as noticesStore } from '@wordpress/notices';

const Notices = () => {
    const notices = useSelect( (select) =>
            select( noticesStore) .getNotices()
                .filter( (notice) => notice.type === 'snackbar' ),
        []
    );
    const { removeNotice } = useDispatch( noticesStore );
    return (<SnackbarList
            className="edit-site-notices"
            notices={ notices }
            onRemove={ removeNotice }
        />
    );
};

class App extends Component {
    constructor() {
        super( ...arguments );

        this.state = {
            exampleSelect: '',
            exampleText: '',
            exampleText2: '',
            exampleText3: '',
            exampleToggle: false,
            isAPILoaded: false,
        };
    }

    componentDidMount() {

        api.loadPromise.then( () => {
            this.settings = new api.models.Settings();

            const { isAPILoaded } = this.state;

            if (isAPILoaded === false) {
                this.settings.fetch().then( (response) => {
                    this.setState( {
                        exampleSelect: response[ 'wholesomecode_wholesome_plugin_example_select' ],
                        exampleText: response[ 'wholesomecode_wholesome_plugin_example_text' ],
                        exampleText2: response[ 'wholesomecode_wholesome_plugin_example_text_2' ],
                        exampleText3: response[ 'wholesomecode_wholesome_plugin_example_text_3' ],
                        exampleToggle: Boolean( response[ 'wholesomecode_wholesome_plugin_example_toggle' ] ),
                        isAPILoaded: true,
                    } );
                } );
            }
        } );
    }

    render() {
        const {
            exampleSelect,
            exampleText,
            exampleText2,
            exampleText3,
            exampleToggle,
            isAPILoaded,
        } = this.state;

        if (! isAPILoaded) {
            return (<Placeholder>
                    <Spinner />
                </Placeholder>
            );
        }

        return (<Fragment>
                <div className="wholesome-plugin__header">
                    <div className="wholesome-plugin__container">
                        <div className="wholesome-plugin__title">
                            <h1>{ __( 'Wholesome Plugin Settings', 'wholesome-plugin') } <Icon icon="admin-plugins" /></h1>
                        </div>
                    </div>
                </div>

                <div className="wholesome-plugin__main">
                    <Panel>
                        <PanelBody
                            title={ __( 'Panel Body One', 'wholesome-plugin') }
                            icon="admin-plugins"
                        >
                            <SelectControl
                                help={ __( 'An example dropdown field.', 'wholesome-plugin') }
                                label={ __( 'Example Select', 'wholesome-plugin') }
                                onChange={ (exampleSelect) => this.setState( { exampleSelect }) }
                                options={ [
                                    {
                                        label: __( 'Please Select...', 'wholesome-plugin' ),
                                        value: '',
                                    },
                                    {
                                        label: __( 'Option 1', 'wholesome-plugin' ),
                                        value: 'option-1',
                                    },
                                    {
                                        label: __( 'Option 2', 'wholesome-plugin' ),
                                        value: 'option-2',
                                    },
                                ] }
                                value={ exampleSelect }
                            />
                        </PanelBody>
                        <PanelBody
                            title={ __( 'Panel Body Two', 'wholesome-plugin') }
                            icon="admin-plugins"
                        >
                            <TextControl
                                help={ __( 'This is an example text field.', 'wholesome-plugin') }
                                label={ __( 'Example Text', 'wholesome-plugin') }
                                onChange={ (exampleText) => this.setState( { exampleText }) }
                                value={ exampleText }
                            />

                        </PanelBody>
                        <PanelBody
                            title={ __( 'Panel Body Three', 'wholesome-plugin') }
                            icon="admin-plugins"
                        >
                            <PanelRow>
                                <TextControl
                                    help={ __( 'Use PanelRow to place controls inline.', 'wholesome-plugin') }
                                    label={ __( 'Example Text 2', 'wholesome-plugin') }
                                    onChange={ (exampleText2) => this.setState( { exampleText2 }) }
                                    value={ exampleText2 }
                                />
                                <TextControl
                                    help={ __( 'This control is inline.', 'wholesome-plugin') }
                                    label={ __( 'Example Text 3', 'wholesome-plugin') }
                                    onChange={ (exampleText3) => this.setState( { exampleText3 }) }
                                    value={ exampleText3 }
                                />
                            </PanelRow>
                        </PanelBody>
                        <PanelBody
                            title={ __( 'Panel Body Four', 'wholesome-plugin') }
                            icon="admin-plugins"
                        >
                            <ToggleControl
                                checked={ exampleToggle }
                                help={ __( 'An example toggle.', 'wholesome-plugin') }
                                label={ __( 'Example Toggle', 'wholesome-plugin') }
                                onChange={ (exampleToggle) => this.setState( { exampleToggle }) }
                            />
                        </PanelBody>
                        <Button
                            isPrimary
                            isLarge
                            onClick={ () => {
                                const {
                                    exampleSelect,
                                    exampleText,
                                    exampleText2,
                                    exampleText3,
                                    exampleToggle,
                                } = this.state;

                                const settings = new api.models.Settings( {
                                    [ 'wholesomecode_wholesome_plugin_example_select' ]: exampleSelect,
                                    [ 'wholesomecode_wholesome_plugin_example_text' ]: exampleText,
                                    [ 'wholesomecode_wholesome_plugin_example_text_2' ]: exampleText2,
                                    [ 'wholesomecode_wholesome_plugin_example_text_3' ]: exampleText3,
                                    [ 'wholesomecode_wholesome_plugin_example_toggle' ]: exampleToggle? 'true': '',
                                } );
                                settings.save();

                                dispatch('core/notices').createNotice(
                                    'success',
                                    __( 'Settings Saved', 'wholesome-plugin' ),
                                    {
                                        type: 'snackbar',
                                        isDismissible: true,
                                    }
                                );
                            }}
                        >
                            { __( 'Save', 'wholesome-plugin') }
                        </Button>
                    </Panel>
                </div>

                <div className="wholesome-plugin__notices">
                    <Notices/>
                </div>

            </Fragment>) }
}

document.addEventListener( 'DOMContentLoaded', () => {
    const htmlOutput = document.getElementById( 'wholesome-plugin-settings' );

    if (htmlOutput) {
        render(
            <App />,
            htmlOutput
        );
    }
});
Додайте SCSS
Час виправити ці стилі. Просто додайте наступне у /src/admin.scssфайл (який ви б створили в посібнику «Додати точки входу до створення сценарію блоку».
#wholesome-plugin-settings {

    .components-placeholder {
        background: #f1f1f1;
    }

    .wholesome-plugin__header {
        background-color: #ffffff;
        box-shadow: 0 1px 0 rgba(213, 213, 213, .5), 0 1px 2px #eeeeee;
        margin-left: -2em;
        padding: 20px 10px;

        .wholesome-plugin__container {
            margin: 0 auto;
            max-width: 750px;

            .wholesome-plugin__title {
                align-items: center;
                display: flex;
                justify-content: center;

                .dashicon {
                    color: #757575;
                }
            }
        }
    }

    .wholesome-plugin__main {
        margin-left: auto;
        margin-right: auto;
        max-width: 750px;

        .components-panel {
            background: none;
            border: none;
        }

        .components-panel__body {
            background: #ffffff;
            border: 1px solid #e2e4e7;
            margin: 1rem 0;
        }
    }

    .components-base-control__help {
        margin-top: .5rem;
    }

    .components-panel__row {
        > div {
            flex-grow: 1;
            margin-right: 1rem;

            &:last-of-type {
                margin-right: 0;
            }
        }
    }

    .wholesome-plugin__notices {
        .components-snackbar {
            bottom: .5rem;
            position: fixed;
        }
    }
}
Перегляд сторінки налаштувань
Ось кінцевий результат:
 Сторінка налаштувань
Деякі плагіни мають посилання «налаштування» на сторінці плагінів, наприклад:
 Посилання на налаштування на панелі сторінки налаштувань плагіна
Для цього додайте наступний блок коду до кореня вашого файлу плагіна (у цьому випадку wholesome-plugin.php):
function wholesomecode_wholesome_plugin_settings_link( $links ): array {
    $label = esc_html__( 'Settings', 'wholesome-plugin' );
    $slug  = 'wholesome_plugin_settings';

    array_unshift( $links, "<a href='options-general.php?page=$slug'>$label</a>" );

    return $links;
}
add_action( 'plugin_action_links_'. plugin_basename( __FILE__ ), 'wholesomecode_wholesome_plugin_settings_link', 10 );
- Подивіться на створення вкладених дочірніх блоків за допомогою
InnerBlocksкомпонента - Подивіться на використання пост мета-полів у блоках Гутенберга
- Подивіться на створення панелі налаштувань із компонентами Gutenberg